Running Apache Hadoop on GCP (Page: 1)
Google Cloud Platform provides Cloud Dataproc service to run Apache Hadoop and Apache Spark jobs. In this tutorial I will show, how to set up a simple cluster. This job will run on few parallel nodes, provided by Google Cloud Platform. Later on I will use this cluster to demonstrate simple clustering calculations.
Setting up Hadoop Cluster on the Cloud
First of all we need to initialize a new cluster with Hadoop on GCP (Google Clout Platform). I’m assuming that you are already registered with GCP.
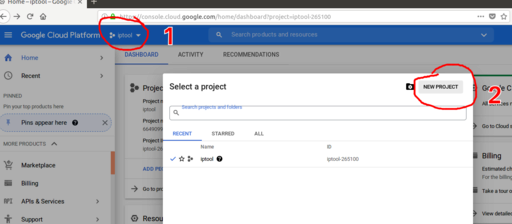
Create new project
Original image: 1248 x 546
1 – Click on project selection in the top left corner to call for project selection tool
2 – Click on “NEW PROJECT” to create new project
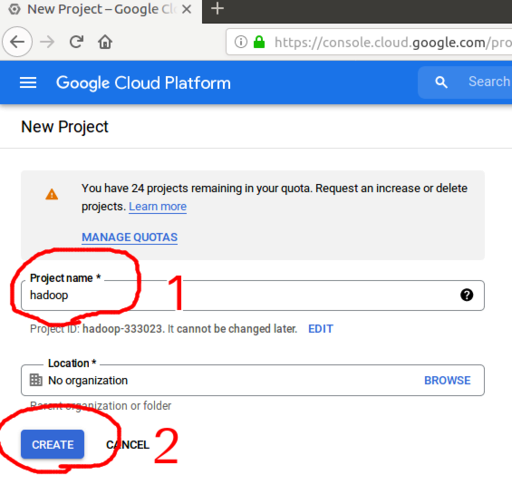
Select name for a new project
Original image: 565 x 556
1 – Type the name of a new project (I’ve choose hadoop)
2 – Click “CREATE”
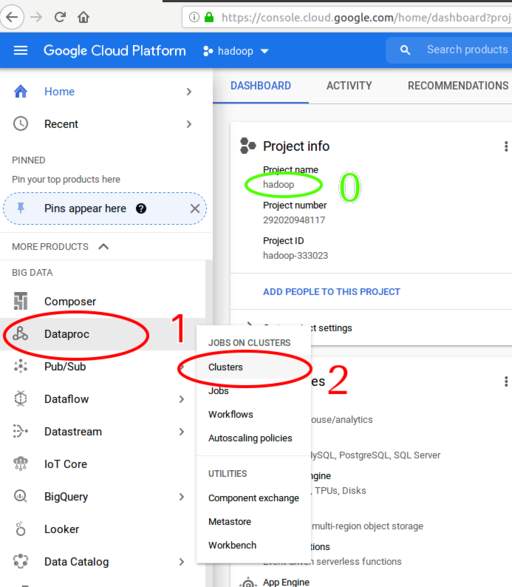
Select type of the new project
Original image: 693 x 794
0 – Make sure that you are working with your current project
1 – On the left menu find the Dataproc option and
2 – Click on clusters – we will use clusters for our Hadoop project.
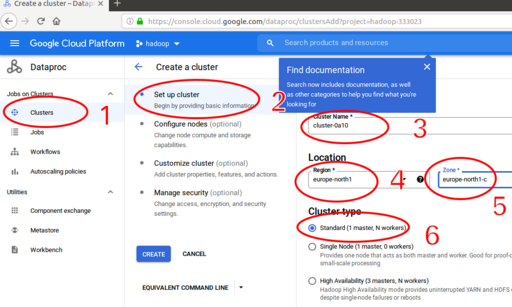
Select type of the new cluster
Original image: 1043 x 626
1 – If you are not redirected automatically, go to Google Cloud Platform, Select Dataproc in left menu and then click on Clusters
2 – Select Set up cluster
3 – Name of your cluster
4 – Choose region of your cluster. It is better to select something located near to you
5 – Zone – use any zone
6 – Select type of the cluster. Fro our purposes, we will use Standard: 1 master, N workers
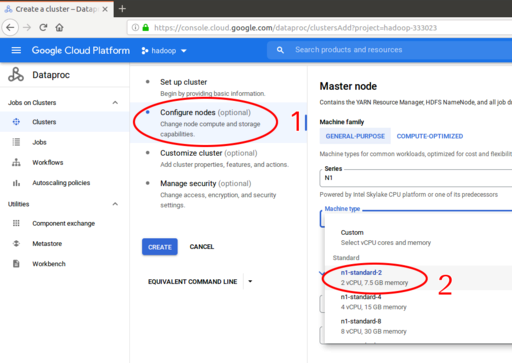
Configure parameters of your nodes
Original image: 1009 x 716
1 – Click on Configure nodes
2 – Choose smallest machine type 2vCPU, 7.5 GB memory - for the test task you don’t need to have any powerful options.
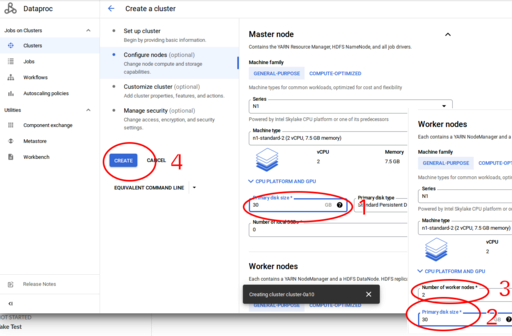
Configure parameters of the disks for nodes
Original image: 1286 x 844
1 – Select 30 GB for the Primary disk size for Master node. You need to use smallest disk size for the test task, but the 30GB is the smallest size for the disk with operational system.
2 – Select 30 GB for the primary disk size for Worker nodes. Again this is minimal possible size for disk space with operational system
3 – make sure that you have 2 nodes. Again for the test purposes 2 nodes is enough
4 – Click on create and wait some time for the GCP creating this cluster for you
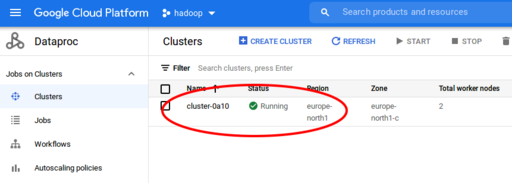
After some time the cluster will be ready.
Original image: 861 x 308
Wait less than 1 min and the cluster will be ready for further usage
Setting up network for access
When cluster is ready, it is necessary to set up network to access and browse this cluster. A Virtual Private Cloud (VPC) network is a virtual version of a physical network, implemented inside of Google's production network
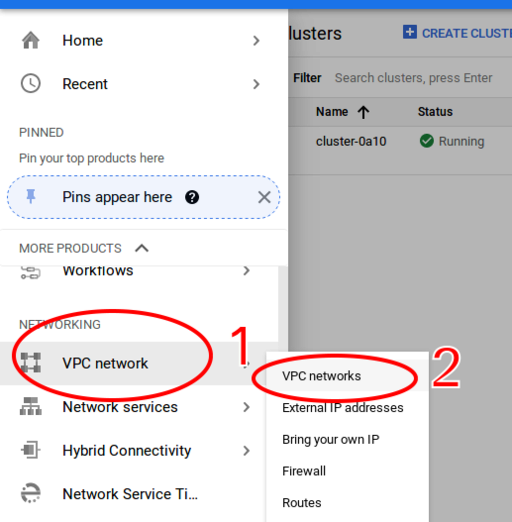
Configuring VPC network for cluster access.
Original image: 517 x 527
1 – In the left menu, select VPC network from the NETWORKING section
2 – Click on VPC network
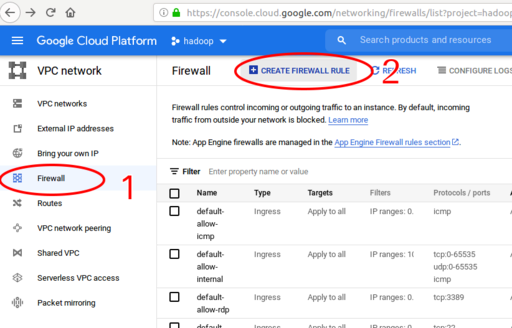
Configuring firewall for the instances access
Original image: 822 x 527
1 – Click on Firewall in the left menu
2 – Click on CREATE FIREWALL RULE at the top of the page
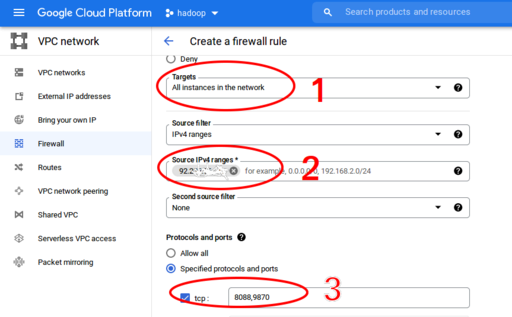
Important details about firewall configuration
Original image: 863 x 535
1 – This firewall will work for every instance in our system. Therefore we need to set up target to All instances in the network to have an access to everything within our cluster-clustering
2 – It is necessary to give IP address from wich you will access this cluster. You can use IPTOOL for checking your IP address. If you have dynamic IP – then contact with your provider and ask to fix it or ask for IP-range.
3 – Specify ports for access. It is necessary to give ports 8088 and 9870 together with option Specified protocols and ports
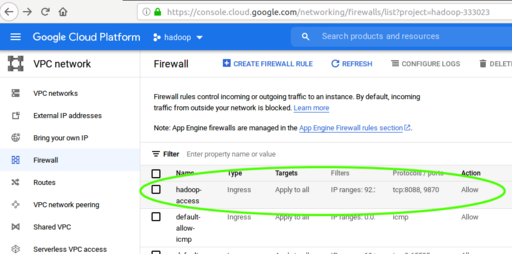
Check the firewall status
Original image: 919 x 456
After all these steps you should have the information about your firewall and see that is it running.
Published: 2021-11-24 06:10:16