Python NumPy (Page: 3)
NumPy image manipulations
NumPy array can work with standard images. Let’s consider some examples. First of all, we need to have few libraries available:
- numpy - Munpy array library itself
- matplotlib.pyplot - is a state-based interface to matplotlib. It provides a MATLAB-like way of plotting.
- scipy - The SciPy library is one of the core packages that make up the SciPy stack. It provides many user-friendly and efficient numerical routines, such as routines for numerical integration, interpolation, optimization, linear algebra, and statistics.

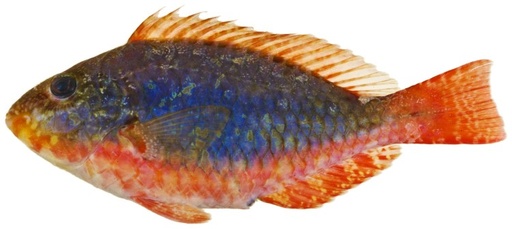
This is a picture of Sparisoma aurofrenatum or rainbow parrot fish from Wikipedia
Original image: 750 x 335
Read image with NumPy
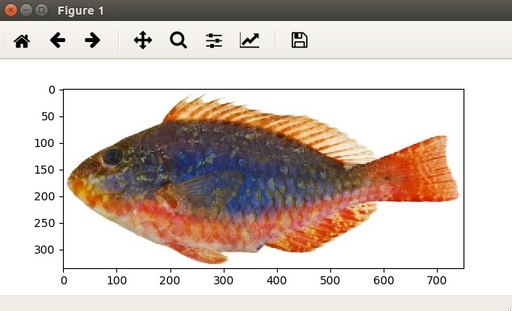
First of all we will read image into NumPy array with ndimage function, check parameters of this image and display it with Python matplotlib.pyplot library
import numpy as np
import matplotlib.pyplot as plt
from scipy import ndimage

img_array = ndimage.imread('22_fish.jpg') # read image into NumPy array
print(img_array.shape)                    # (335, 750, 3) y=335, x=750
                                          # 3 layers for R, G and B colours
                                          # B&W image have only one colour layer
print(type(img_array))                    #
plt.imshow(img_array)                     # convert into displayable format
plt.show() # display image 
Fish picture displayed with matplotlib.pyplot library in our script
Original image: 634 x 385
In all following scripts, we are assuming, that we load all necessary libraries and already read image into ‘img_array’
Image slicing
We can slice our array and every slice will be a part of our image. Just with standard slicing tools
sliced = img_array[200:, 350:, :]
plt.imshow(sliced)
plt.show()![Image slicing Display slice [200:, 350:, :], from 200 to 335 by Y, from 350 to 750 by X and all colours](/images/0/0/1/6/t_22_fish_slice.jpg)
Display slice [200:, 350:, :], from 200 to 335 by Y, from 350 to 750 by X and all colours
Original image: 584 x 254
Image mirroring
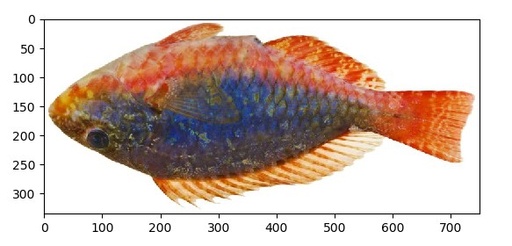
Using these slices we can mirroring image along X or Y axes, or both
x_mirror = img_array[::-1, :, :]
plt.imshow(x_mirror)
plt.show()
Image mirroring over X axis by slice with negative step
Original image: 583 x 280
Simple Image compression
Using step for slicing bigger than 1 we can make compression along this axis by removing some parts of the image. This compression will loose some data, so it will be not very accurate. For more accurate compression we need to recalculate average colours as well.
x_compress = img_array[:, ::3, :]
plt.imshow(x_compress)
plt.show()![Image compression Simple 3 fold image compression along X axis but taking [:, ::3, :] slice](/images/0/0/1/6/22_fish_x_compress.jpg)
Simple 3 fold image compression along X axis but taking [:, ::3, :] slice
Array splitting
It is also possible to split array into few other arrays with ‘split’ function. Axis- show the direction of splitting. Value 0 can be ommited.
y = np.split(img_array, 5, axis=0)
plt.imshow(y[3])
plt.show()
Displaying slice of image over Y axis.
Original image: 548 x 113
Array concatenation
Splited as an array image can be concatenated back. Furthermore – it can be concatenated in different order which will result in changing slices.
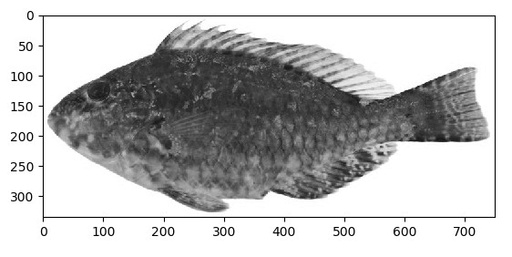
In this example we will split colour axis and then concatenate only one colour – this will give us Back&White image for only one colour from palette. Let’s try to make B&W over Green colour of this fish.
z = np.split(img_array, 3, axis=2)
plt.imshow(np.concatenate((z[1],z[1],z[1]), axis=2))
plt.show()
Red and Blue colour layers are removed and Green turns into Black and White colour
Original image: 562 x 282
Published: 2021-10-04 11:48:19
Updated: 2021-11-14 08:41:55