How to increase swap space in Ubuntu
A very common problem is when we need to run memory memory-consuming applications and we lack free RAM and the swap is not big enough. In this case, we need to increase swap space, and it is possible to do it on the fly, without restarting the computer.
Usually, swap is 1000, or even more times slower than RAM, but this is not crucial, because it is a very common case, when a lot of memory is consumed by applications which do not require high performance at this point and they are okay to be kept is low swap space.
Check memory status
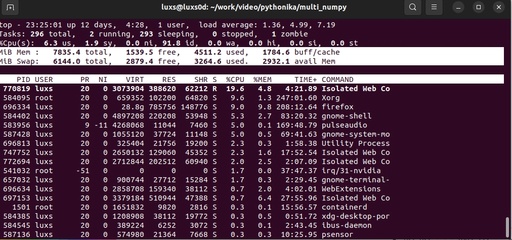
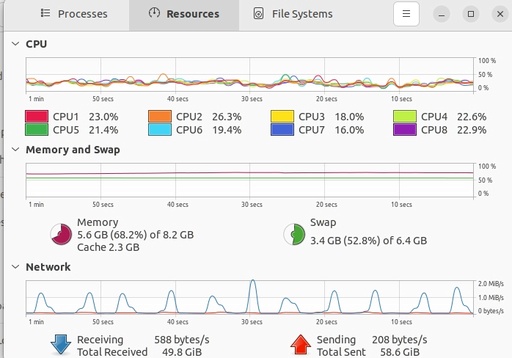
To check memory status, you can run command top, or use any graphical monitors

The status of a memory and SWAP space according to the top command in Ubuntu.
Original image: 1012 x 474

Memory and SWAP status according to the Ubuntu graphical monitor - system monitor
Original image: 698 x 488
However, it is more professional to check the status of the system with special commands.
It is important to understand, shat swap is a system util and some of the operations required ROOT or SU priority. It is possible to see by the sudo command at the beginning of these commands subsequently entering the root password.
Check the status of the swap:
sudo swapon --showthe result will be something similar to:
[sudo] password for luxs:
NAME       TYPE SIZE USED PRIO
/swapfile  file   2G   2G   -2
/swapfile1 file   4G 1.1G   -3
As you can see, I have two swap files
To check the total memory, use the command:
free -hThe results will be like this one:
               total        used        free      shared  buff/cache   available
Mem:           7.7Gi       4.7Gi       876Mi        98Mi       2.1Gi       2.6Gi
Swap:          6.0Gi       3.1Gi       2.9Gi
This is the overall status of the memory.
It is also important to understand, that you need to have enough space on the hard drive, and also, if you have a few hard drives, then you need to choose the fastest one.
Installing SWAP
Create the swap (/swapfile1) file with the size of 32GB.
sudo fallocate -l 32G /swapfile1Change the mode of this file to be accessible for reading and writing only by root
sudo chmod 600 /swapfile1Now, this file should be converted into a swap format by command:
sudo mkswap /swapfile1That is, the file is ready and it can be activated by the command:
sudo swapon /swapfile1Now you can check the status of the memory by describing the above commands, it is easy.
Permanent swap
This swap file will work only in this session, and after rebooting it will be disconnected. To make it connected, it is necessary to aff the following line: /swapfile1 none swap sw 0 0 to the file /etc/fstab. But before modifications, it is a good idea to make a backup copy of this file:
sudo cp /etc/fstab /etc/fstab.bak
echo '/swapfile1 none swap sw 0 0' | sudo tee -a /etc/fstab
This is how we do it in real-time:
Published: 2023-12-22 00:10:36
Updated: 2023-12-25 00:22:15